

Effortlessly Set Up a LEMP Stack on Rocky Linux 9!
Step by step guide: Setting up a LEMP stack on Rocky Linux 9, the easy way.


Get ready to power up your web development with a sleek and efficient LEMP stack on Rocky Linux 9 - the perfect combination for a smooth and hassle-free setup!
what is a LEMP stack?
LEMP, short for Linux, NGINX, MariaDB, and PHP, is a popular choice for hosting dynamic web applications.
NGINX is free software that can handle a variety of tasks like media streaming, caching, load balancing, and web serving. It's built for speed and dependability.
MariaDB Server, on the other hand, is an open-source relational database that was created by the original creators of MySQL and it is also open source.
Lastly, PHP is an open-source server-side scripting language that's commonly used for web development, particularly for creating dynamic web pages.
what is Rocky Linux?
Rocky Linux is an open-source enterprise operating system designed to be 100% bug-for-bug compatible with Red Hat Enterprise Linux®.
So, you may have heard that Red Hat announced they were stopping development on CentOS, which is a version of their Enterprise Linux. But, not to worry! One of the founders of CentOS decided to create Rocky Linux as a replacement to continue its original goals. So, we still have a reliable option.
set up the virtual machine (VM) & update
For this blog, I'm using a little VM from Linode, it's called a nanode. I set it up with Rocky Linux 9 as the operating system. If you want to check which release your system is running, just run the command I've listed below.
# cat /etc/os-release
NAME="Rocky Linux"
VERSION="9.0 (Blue Onyx)"
ID="rocky"
ID_LIKE="rhel centos fedora"
VERSION_ID="9.0"
PLATFORM_ID="platform:el9"
PRETTY_NAME="Rocky Linux 9.0 (Blue Onyx)"
ANSI_COLOR="0;32"
LOGO="fedora-logo-icon"
CPE_NAME="cpe:/o:rocky:rocky:9::baseos"
HOME_URL="https://rockylinux.org/"
BUG_REPORT_URL="https://bugs.rockylinux.org/"
ROCKY_SUPPORT_PRODUCT="Rocky-Linux-9"
ROCKY_SUPPORT_PRODUCT_VERSION="9.0"
REDHAT_SUPPORT_PRODUCT="Rocky Linux"
REDHAT_SUPPORT_PRODUCT_VERSION="9.0"
Alright, before we dive into the main topic, let's make sure our system is up to date. You can do that by running the below command. This will check for any updates and install them if there are any available. It's always a good idea to keep your system updated for security and performance reasons.
dnf update -y
install and start NGINX
dnf install nginx -y
Alright, now that we've got our system updated, let's get Nginx up and running. This way, Nginx will always be ready to serve up your web pages.
systemctl enable --now nginx
Alright, one more step before we move on. Let's make sure our firewall is set up to allow HTTP and HTTPS services. You can do that by running the command below. This way, your web server will be accessible to the outside world. And don't forget to reload to make sure the changes take effect.
firewall-cmd --permanent --zone=public --add-service=http
firewall-cmd --permanent --zone=public --add-service=https
firewall-cmd --reload
Now that we've got Nginx set up and running, let's make sure it's working properly. One way to do that is by visiting the IP address of the VM in your web browser. If everything is set up correctly, you should see the default Nginx welcome page. So, try it out and see if you can access your web server!

install MariaDB and PHP 8
Now let's move on to installing MariaDB and getting the server up and running.
dnf install mariadb-server
systemctl enable --now mariadb
Now let's make sure our MariaDB installation is secure. You can do that by running the command below. It will prompt you to set a root password, remove anonymous users, disable remote root login and so on. This way you can make sure your MariaDB is secure and ready to use.
mysql_secure_installation
Now let's test the database server by running the command below.
mysqladmin -u root -p version
output:

mysqladmin  Ver 9.1 Distrib 10.5.16-MariaDB, for Linux on x86_64
Copyright (c) 2000, 2018, Oracle, MariaDB Corporation Ab and others.

Server version        10.5.16-MariaDB
Protocol version    10
Connection        Localhost via UNIX socket
UNIX socket        /var/lib/mysql/mysql.sock
Uptime:            1 min 52 sec

Threads: 1  Questions: 21  Slow queries: 0  Opens: 20  Open tables: 13  Queries per second avg: 0.187
Finally, let's install PHP.
dnf install php php-cli php-fpm php-curl php-mysqlnd \
 php-gd php-opcache php-zip php-intl php-common php-bcmath \
 php-json php-readline php-mbstring php-apcu php-xml php-dom -y
Make sure to check the installation by running the command below.
# php -v
PHP 8.0.13 (cli) (built: Nov 16 2021 18:07:21) ( NTS gcc x86_64 )
Copyright (c) The PHP Group
Zend Engine v4.0.13, Copyright (c) Zend Technologies
    with Zend OPcache v8.0.13, Copyright (c), by Zend Technologies
Edit the php-fpm configuration file for NGINX.
vi /etc/php-fpm.d/www.conf
And change user from user=apache and group=apache to nginx
user = nginx
group = nginx
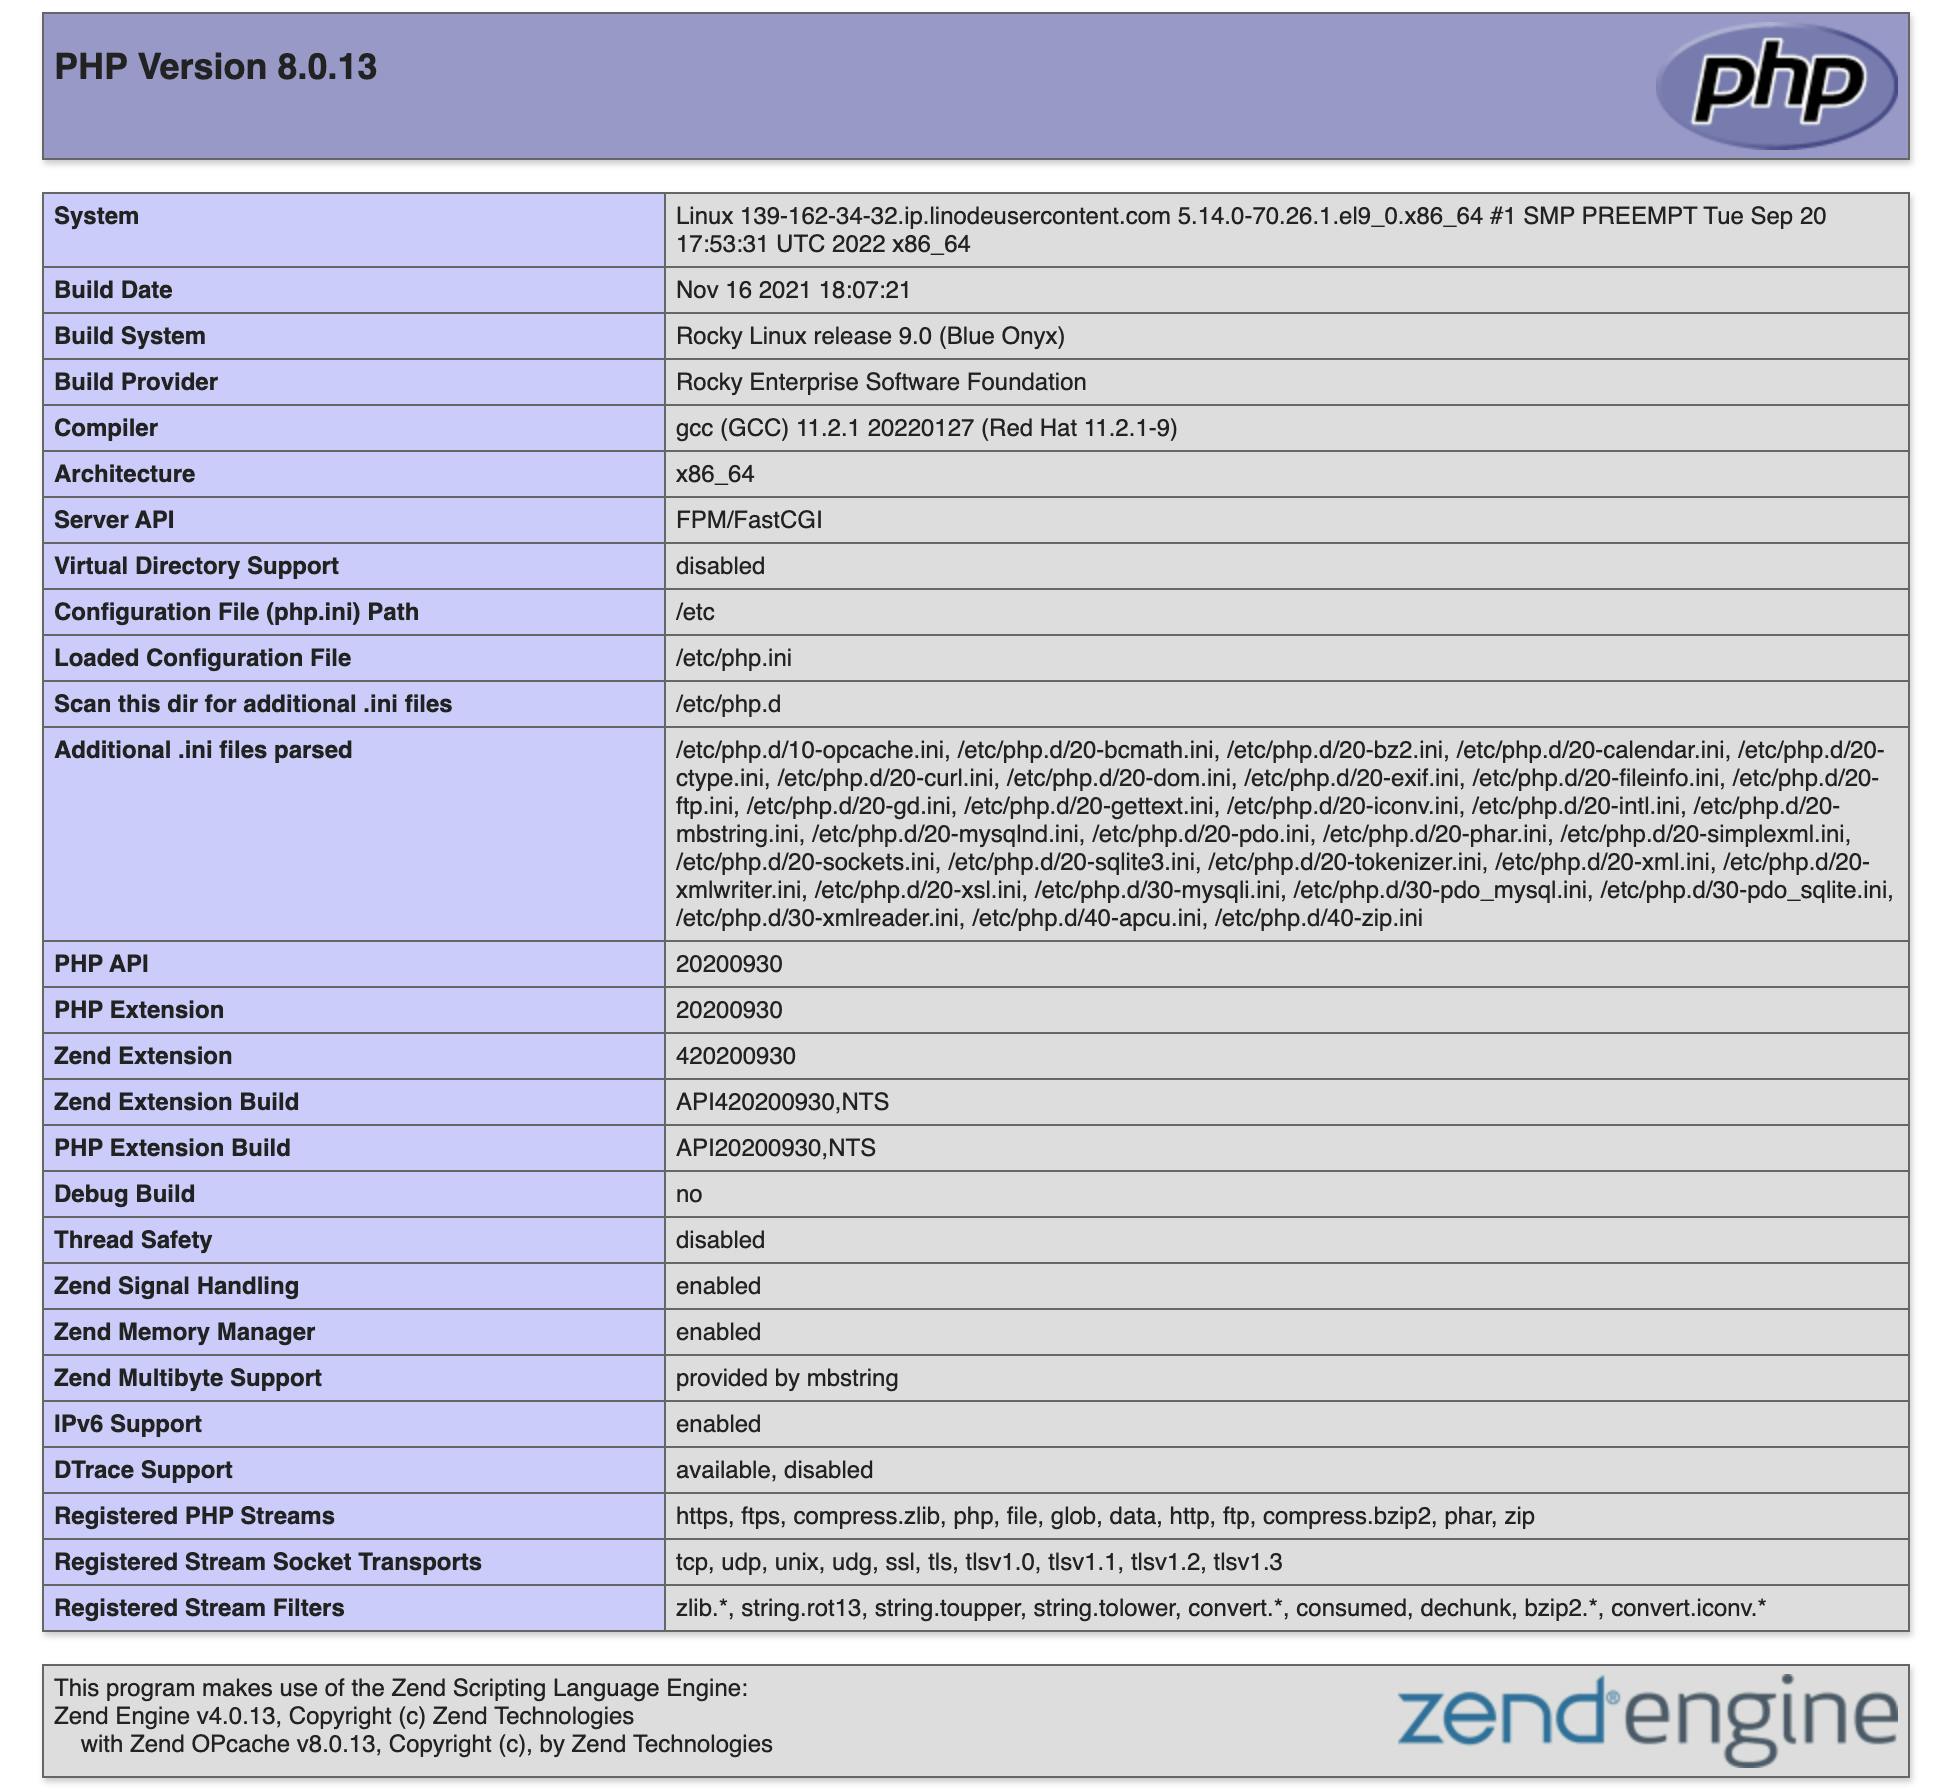
Execute the command below to add phpinfo() to index.php on the server root.
echo "<?php phpinfo(); ?>" > /usr/share/nginx/html/index.php
Restart NGINX.
systemctl restart nginx
Now check the server homepage using the IP address of the virtual machine.
conclusion
Now that you've set up your simple web server with NGINX, you might be wondering what to do next. One great next step would be to install WordPress or Laravel from scratch on the same server.
This will give you a chance to explore more features and functionality that you can do with your server. You can find tutorials and guide on how to do this online and you can always reach out to me if you have any questions.