

How to setup a Kubernetes cluster with Rocky Linux 9 using Proxmox VE on your old laptop?


Have you been looking for a budget method to set up a realistic Kubernetes cluster? Here is a method to configure a cluster with your unused laptop and learn Kubernetes along the way.
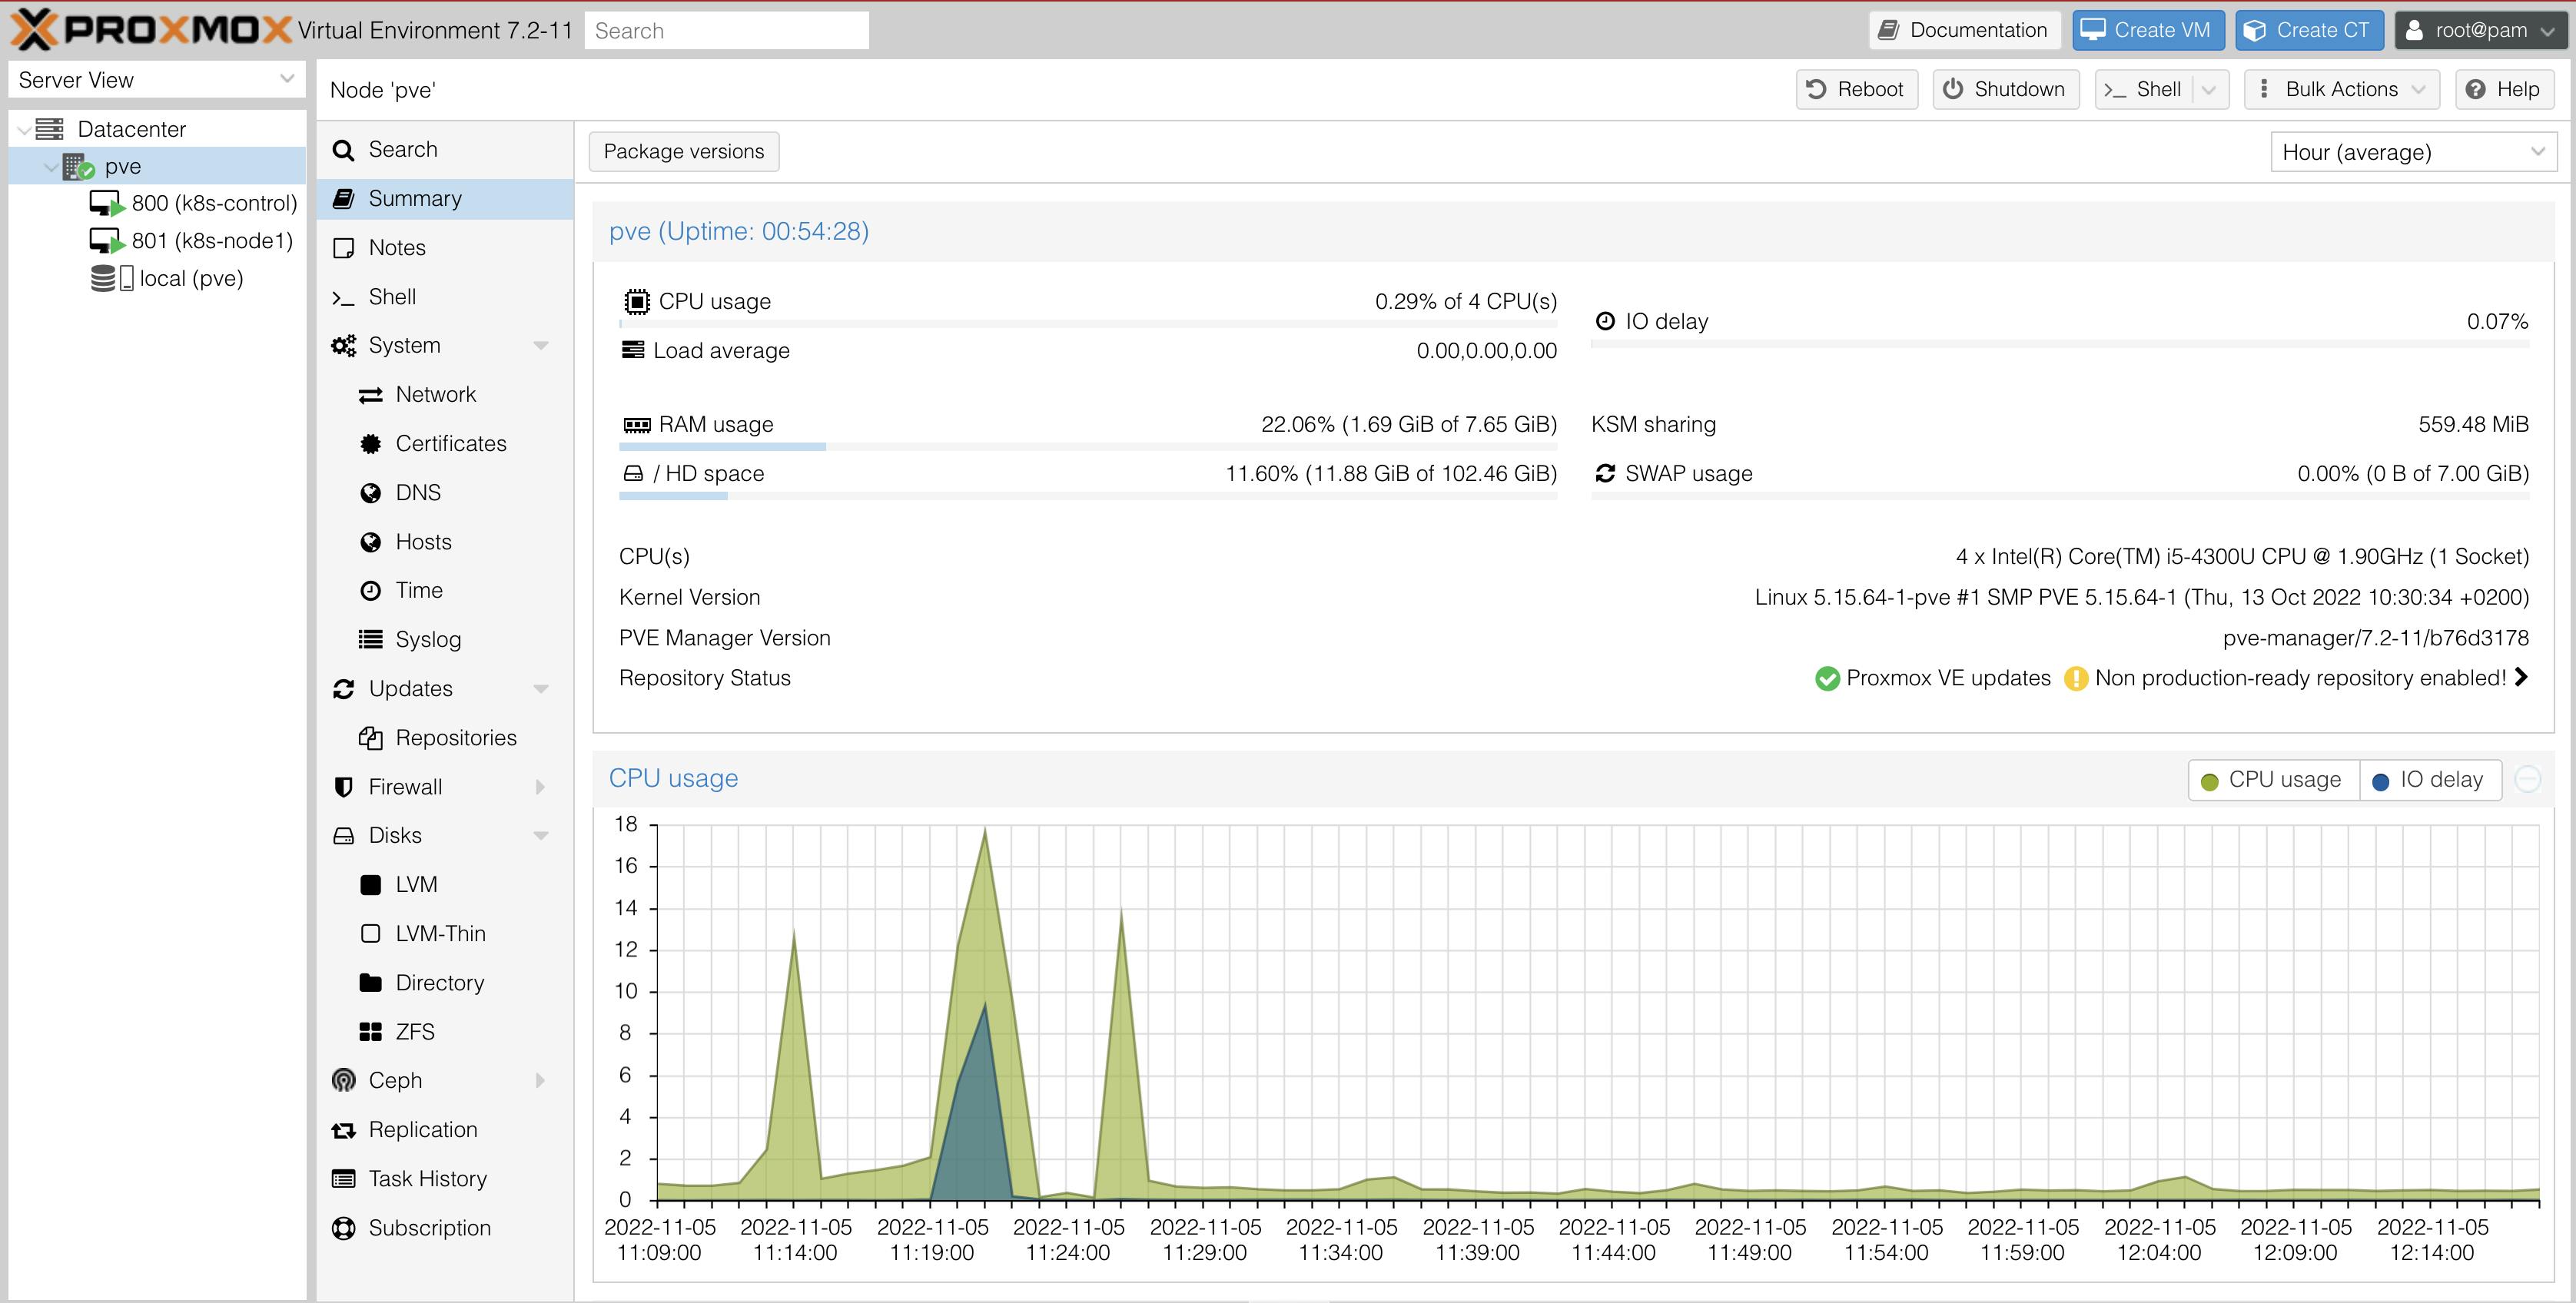
0. Install Proxmox on your spare laptop / desktop / device
0.1 what is proxmox?
Proxmox, specifically Proxmox Virtual Environment (VE), is an open-source server for virtualization management with a built-in web user interface.
0.2 why use proxmox?
Proxmox is a complete suite with all the nuts and bolts included, as it comes with almost everything you need to run complete enterprise-level virtualization solutions.
Of course, it's free!
If you're new to virtualization, then it is useful to know that Proxmox is a type-1 hypervisor.
What is a type-1 hypervisor?
Type-1 hypervisors can provide significant performance for virtualization compared to your run-of-the-mill type-2 hypervisors (like VirtualBox.)
Type-1 hypervisors are also known as "bare-metal hypervisors." click here to learn more.
0.3 how to install?
It is out of scope for a detailed guide on installing Proxmox in this article. I have linked relevant articles and tutorials to install and configure Proxmox below.
If you have installed any operating system on a laptop or a computer, you must be able to download and install it easily.
Download Proxmox VE from here.
1. Create Rocky Linux 9 VMs on Proxmox VE
1.1 prerequisites
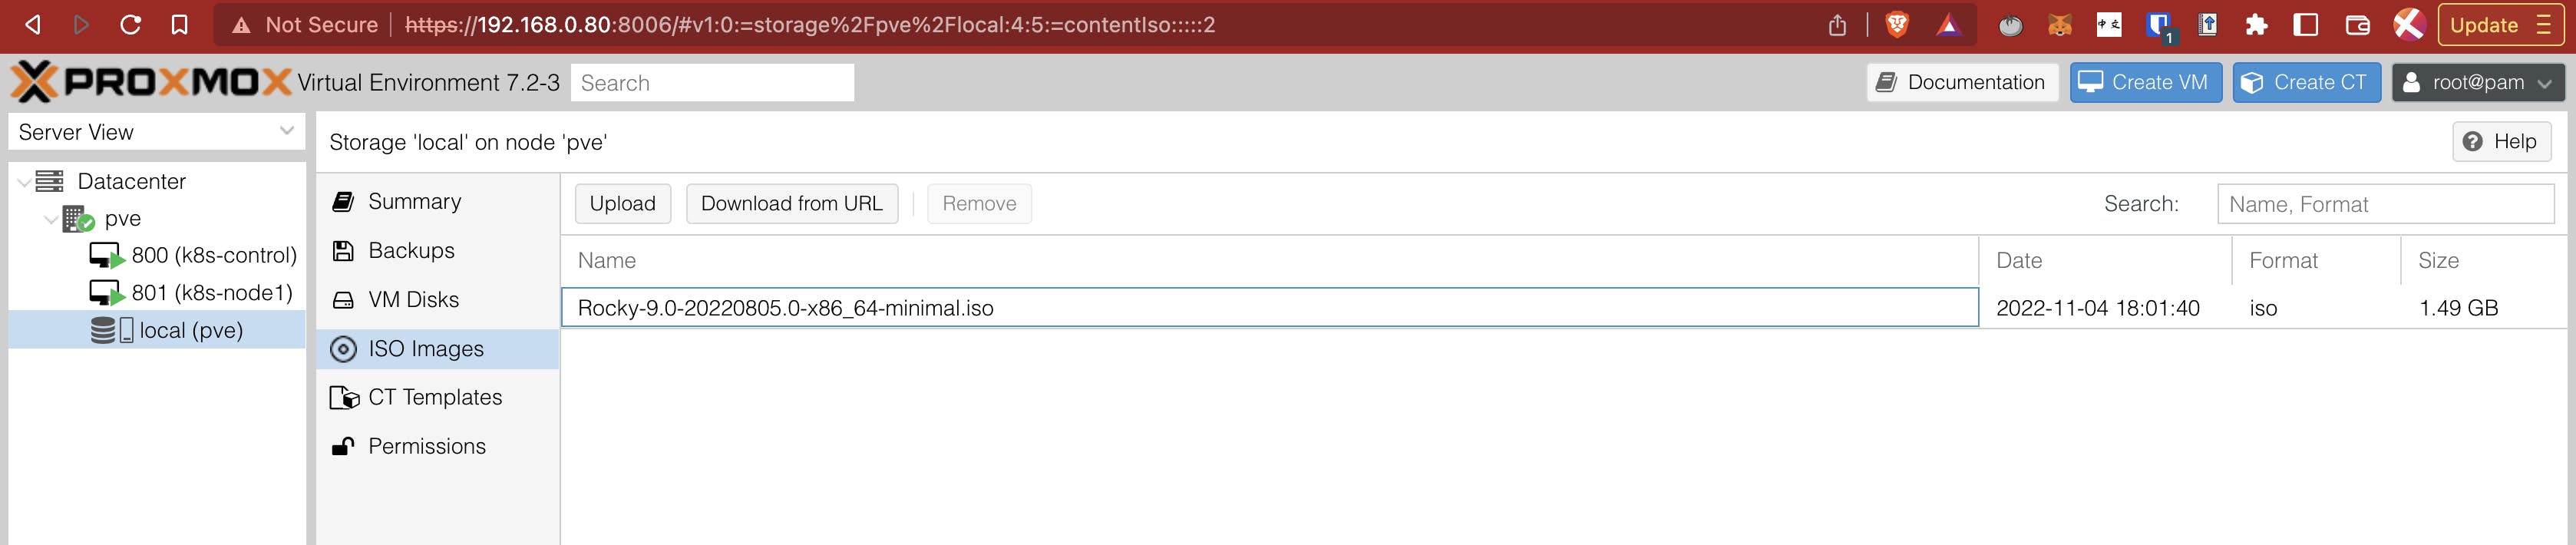
Before we create a virtual machine instance of Rocky Linux, we need to download the installation file.
1.1.1 download installation file
Download the file from here.
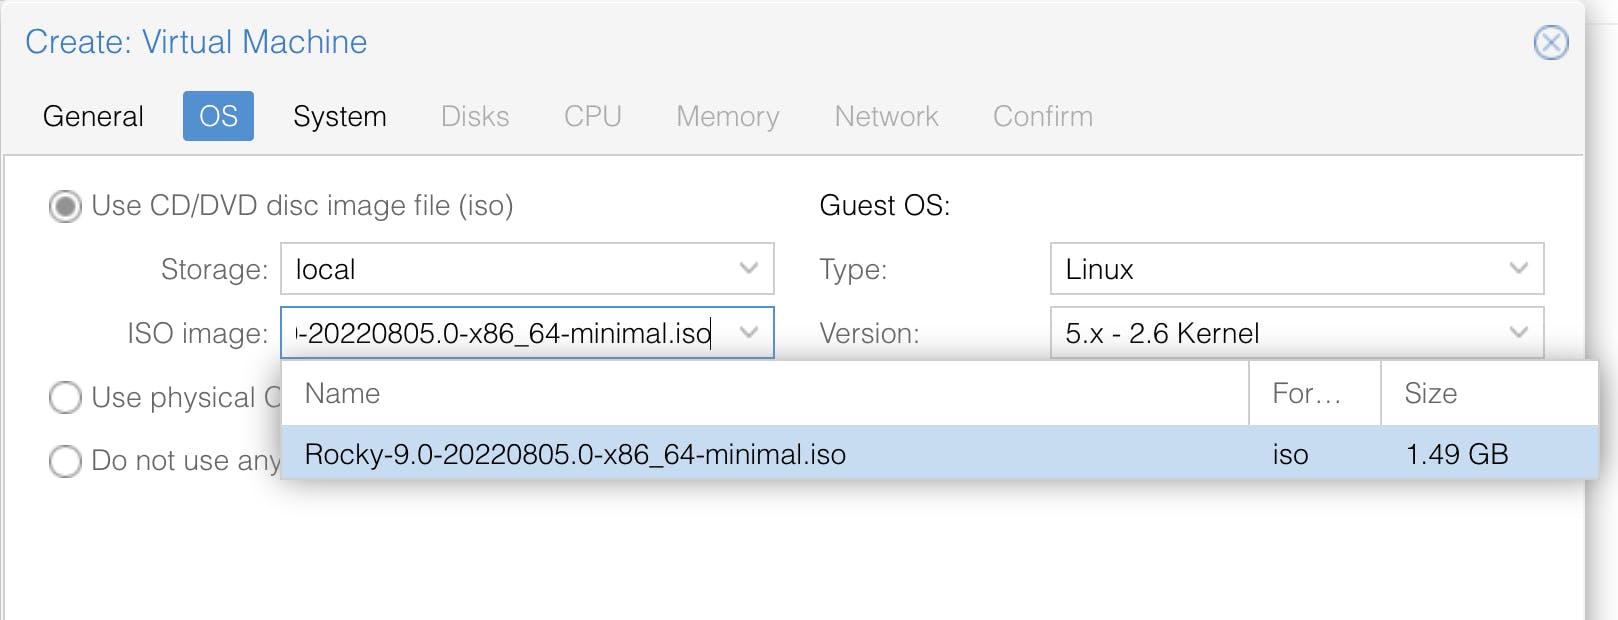
I used the x86_64 minimal ISO for Rocky 9.
Click the upload button as indicated and upload the file.
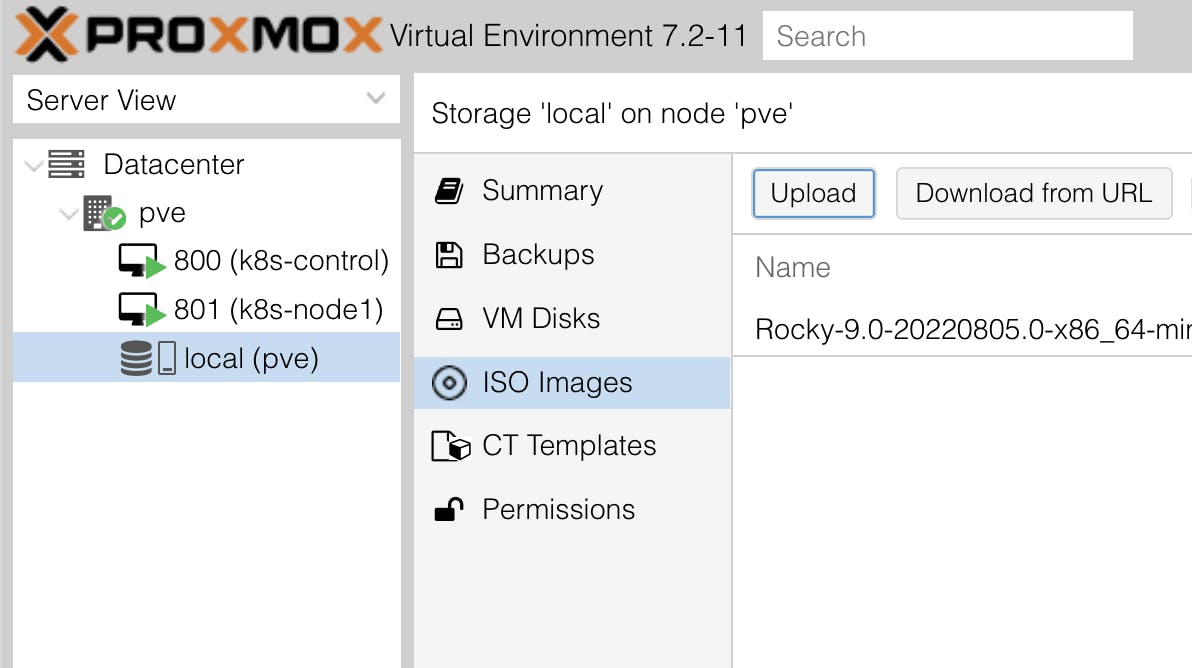
It should look something like this.
1.2 create VM
Now we are ready to create the required virtual machines.
My device has 4 cores (2 cores, 4 threads) with 8 GB of RAM. Hence, I allocated 2 cores with 4 GB of RAM for the control node and 1 core with 2 GB of RAM for the worker node.
You may add more worker nodes if you have the resources.
1.2.1 create
Now, click on the "Create VM" button.

1.2.2 configure
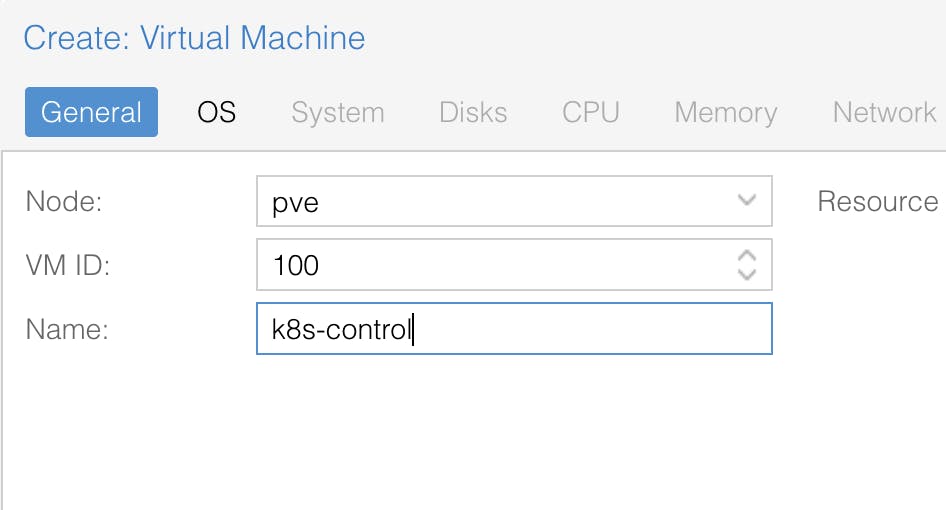
Fill out the name and desired VM ID, and click Next.
In my case, "k8s-control" and "k8s-node1" are the names of the control node and the worker node, respectively.
Select the installation media, i.e., Rocky Linux 9 ISO, and click Next.
Leave everything at default for "System."
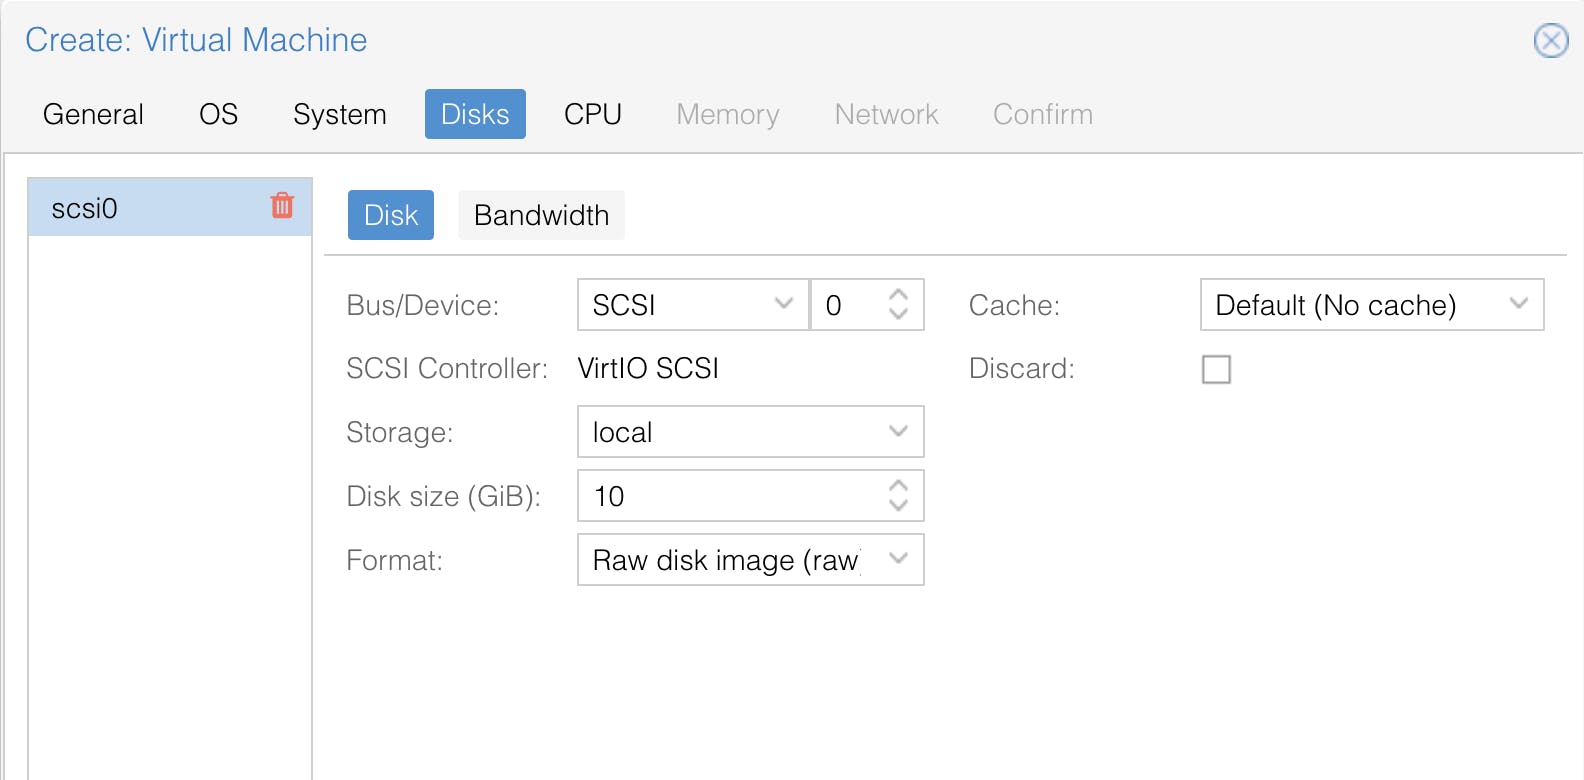
Select the amount of storage you desire, and then click Next.
In my case, it is 10 GB in raw disk format.
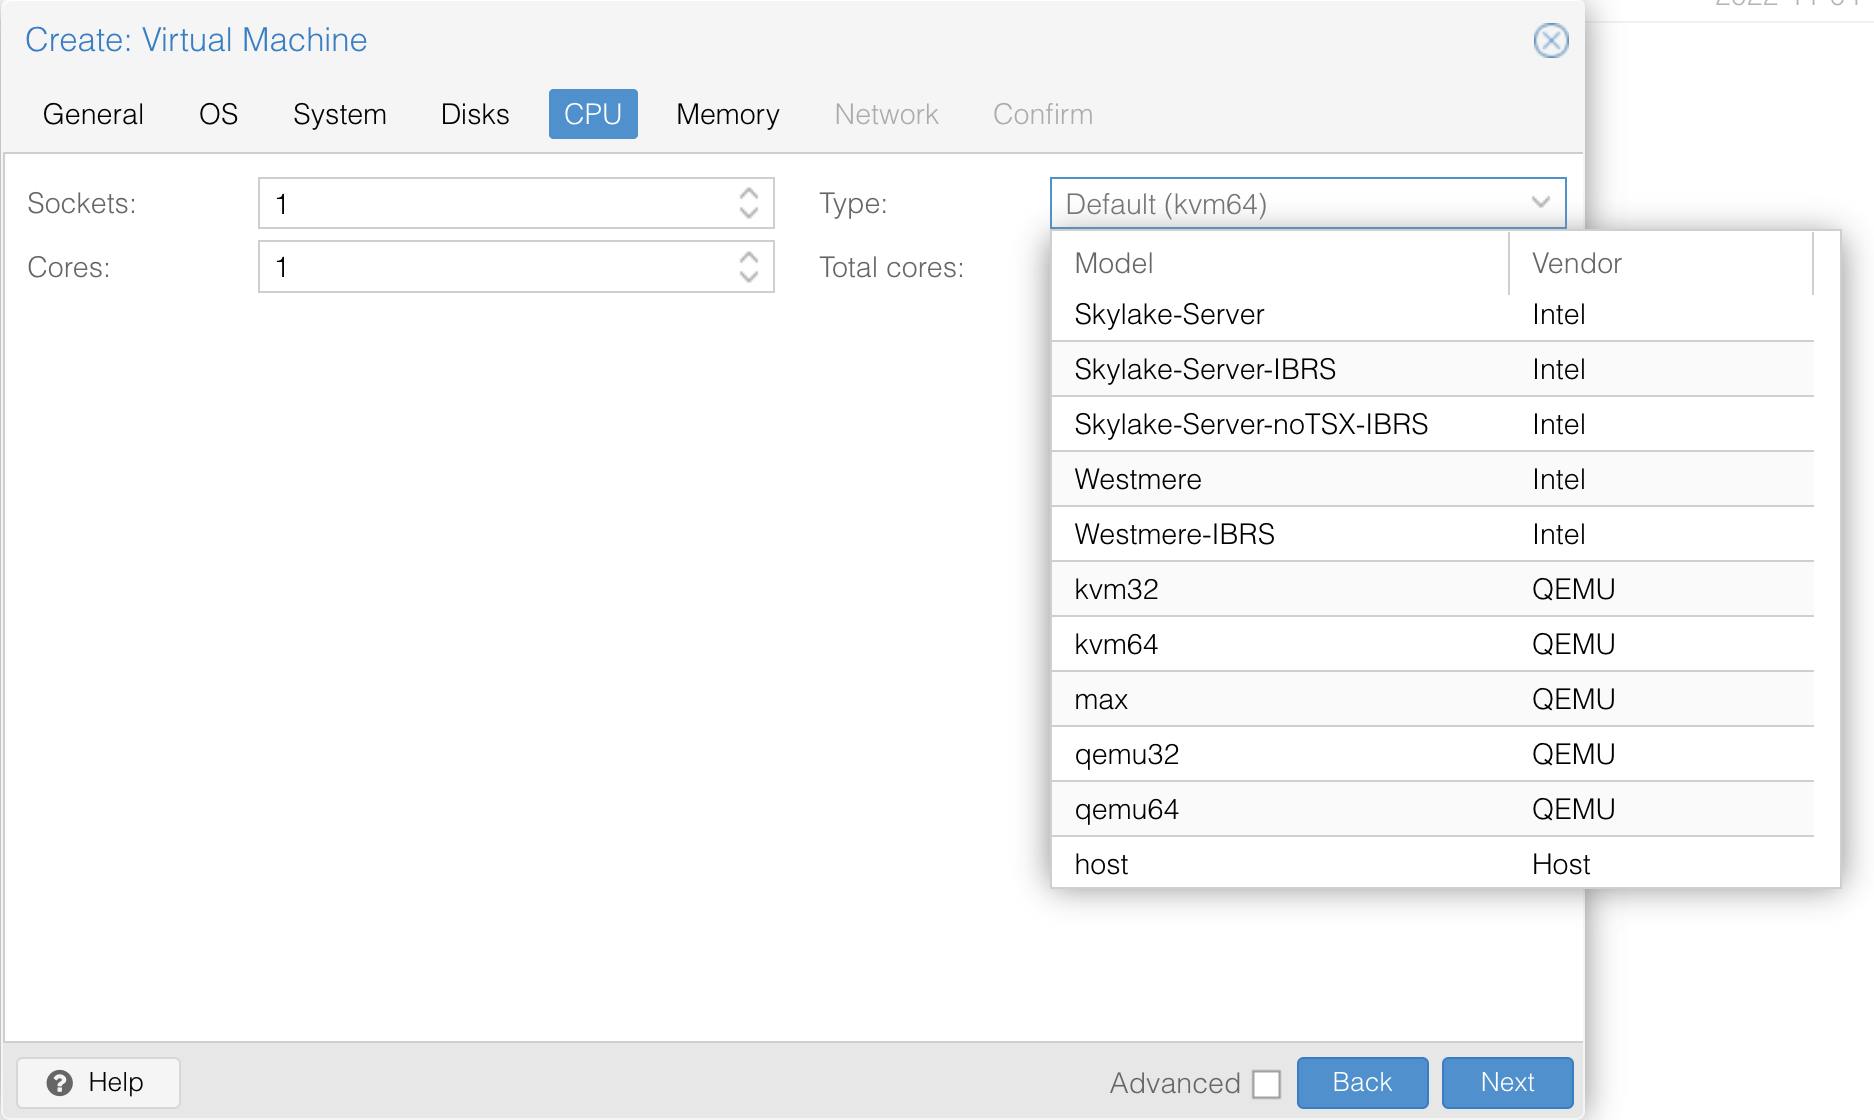
Select your preference of CPU allocation; in my case, it's 2 cores for the control node and 1 core for the worker node.
Select Type as "host," as Rocky Linux 9 will not boot without it.
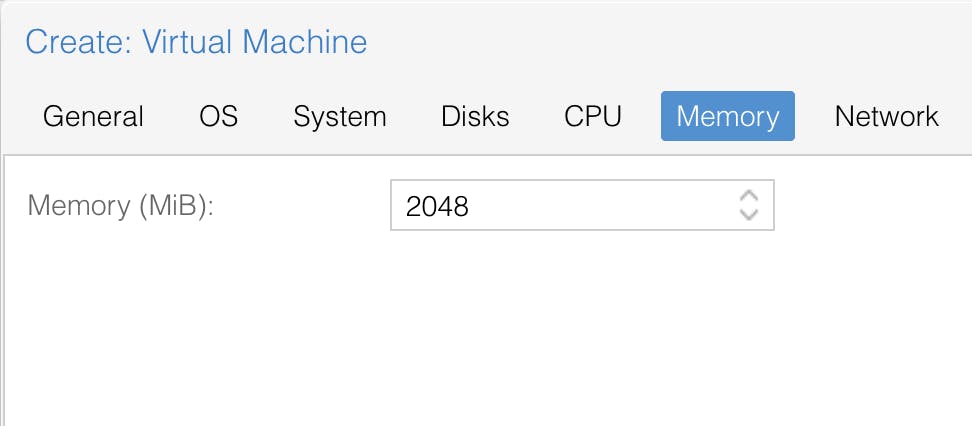
Fill in "memory" as per your preference.
Leave "Network" as the default and finish the process.
1.2.3 install
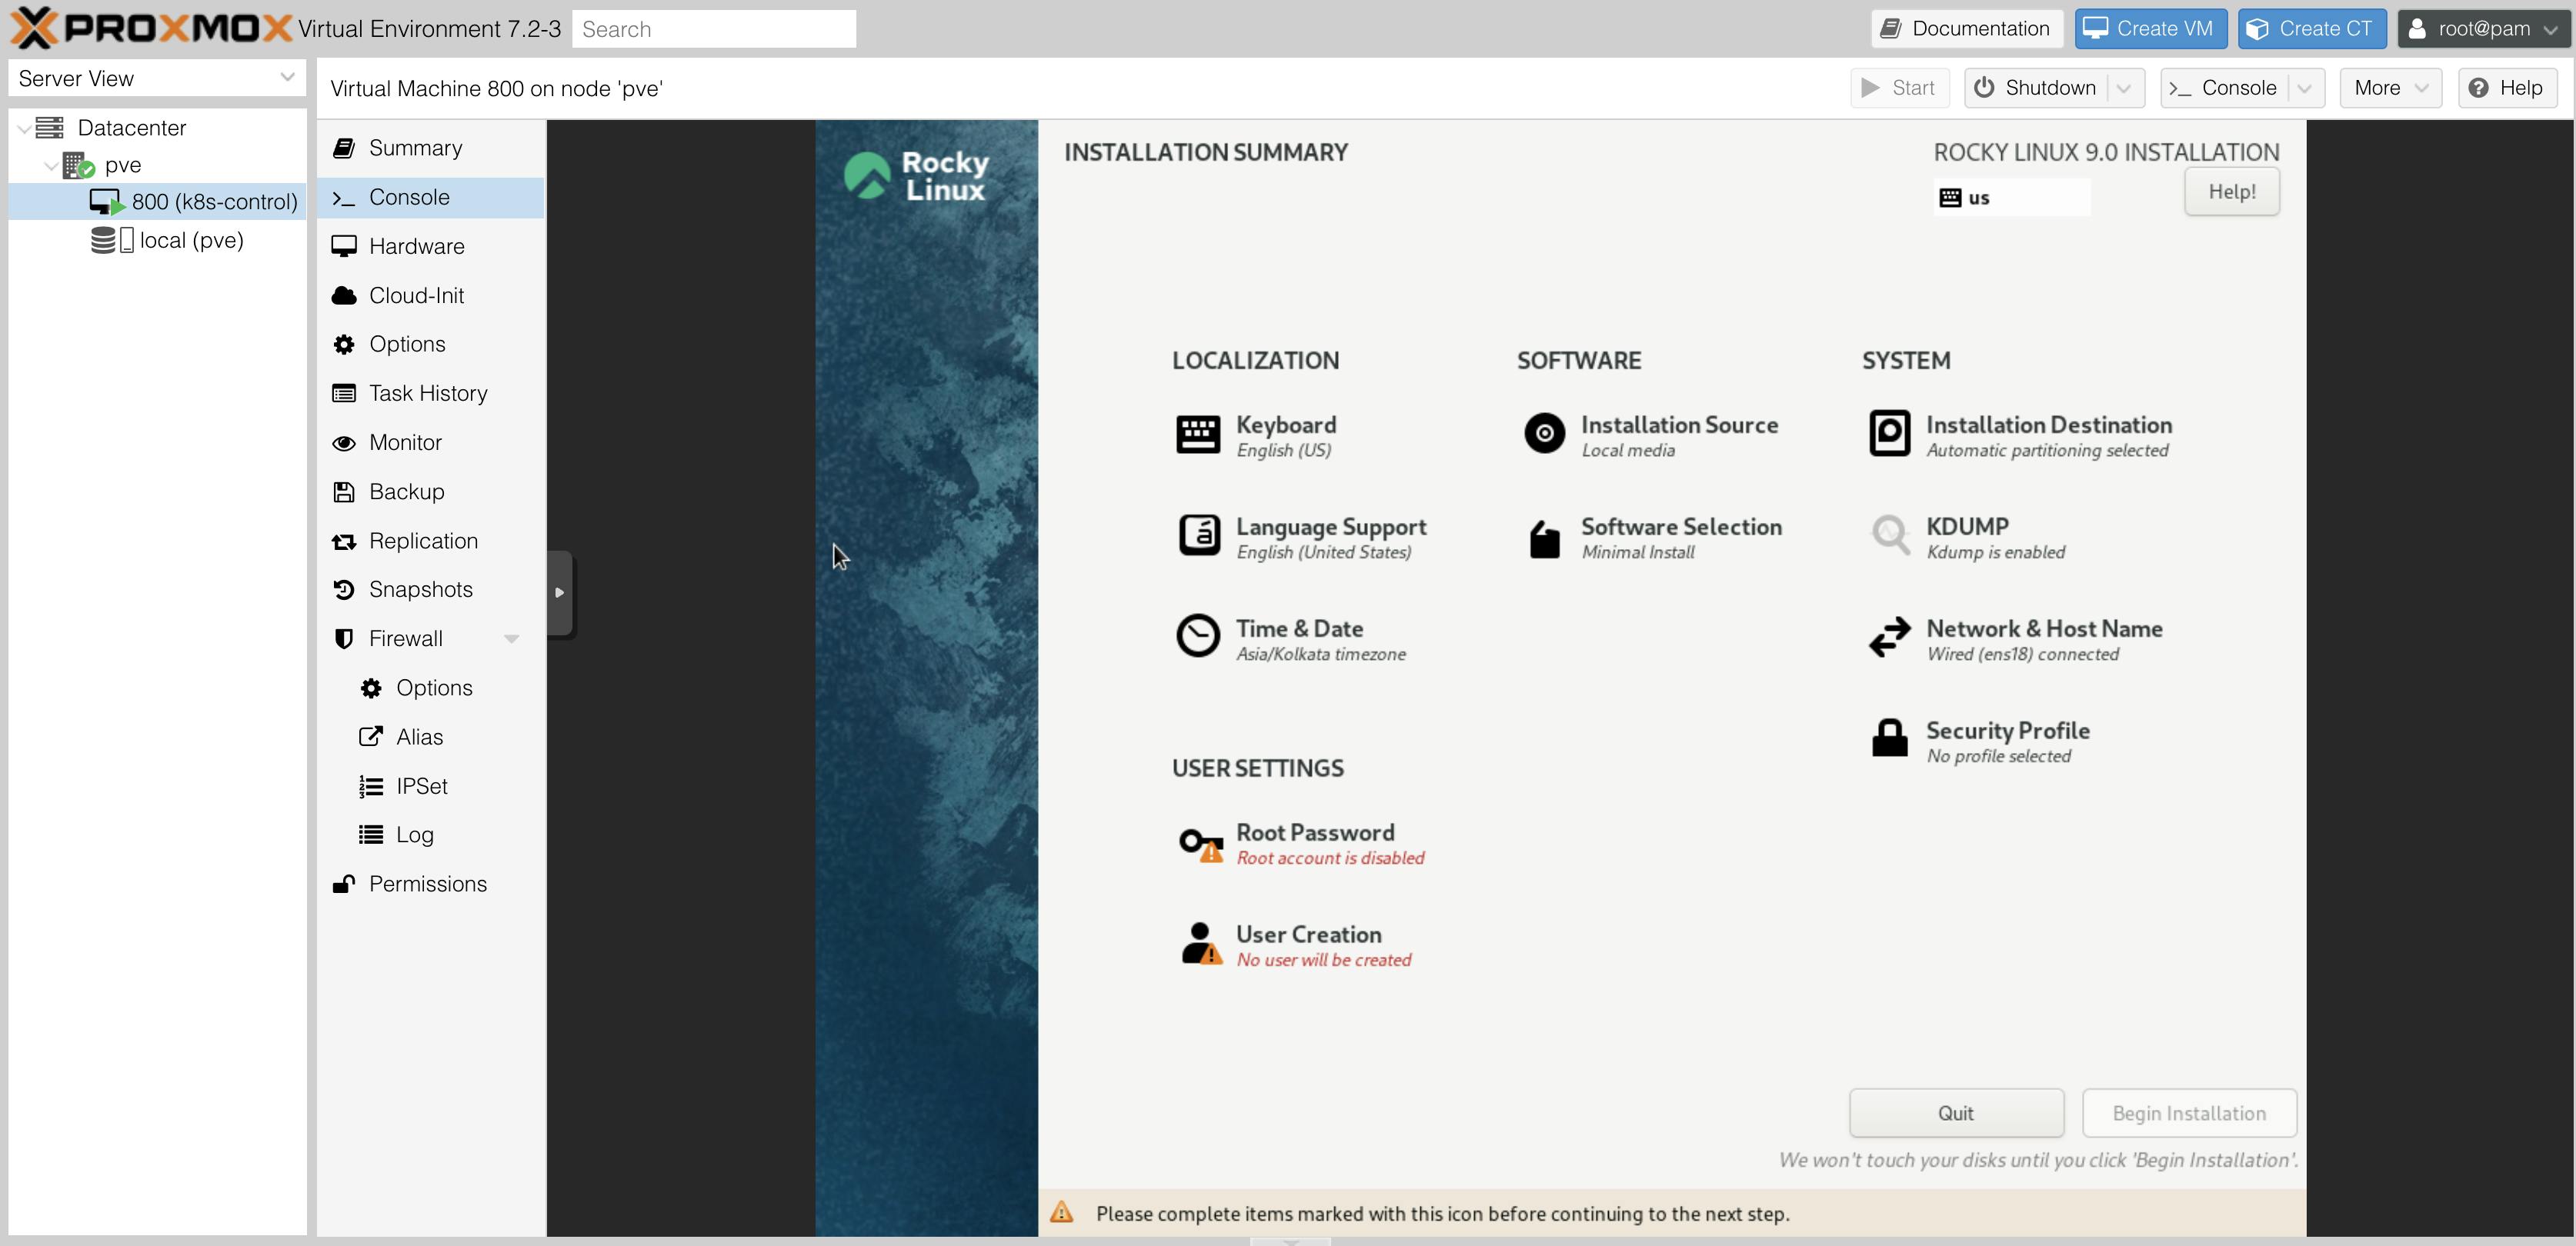
Start the VM if not already, and navigate to the "Console" section. You should be able to see the installation screen.
Fill out the necessary details and begin the installation.
Create a new user and remember the password.
Repeat for all the nodes.
In my case, a control node and a worker node
1.3 update and optimize
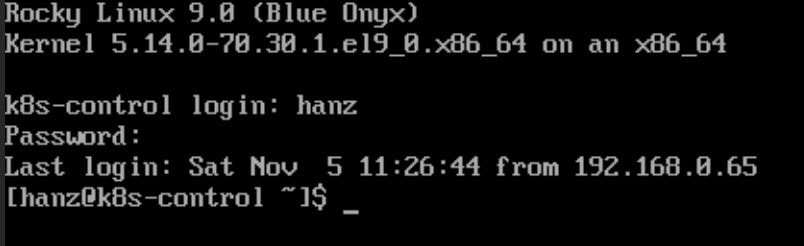
Login to the shell on "Console" with your username and password.
1.3.1 update
Now, update the system.
sudo dnf update -y
If the process here works so far, we are on track.
1.3.2 guest agent
Now, install qemu-guest-agent
sudo dnf install qemu-guest-agent -y
It is a good idea to do this step; this article explains why and how to configure the guest agent in detail here.
1.3.3 set hostname
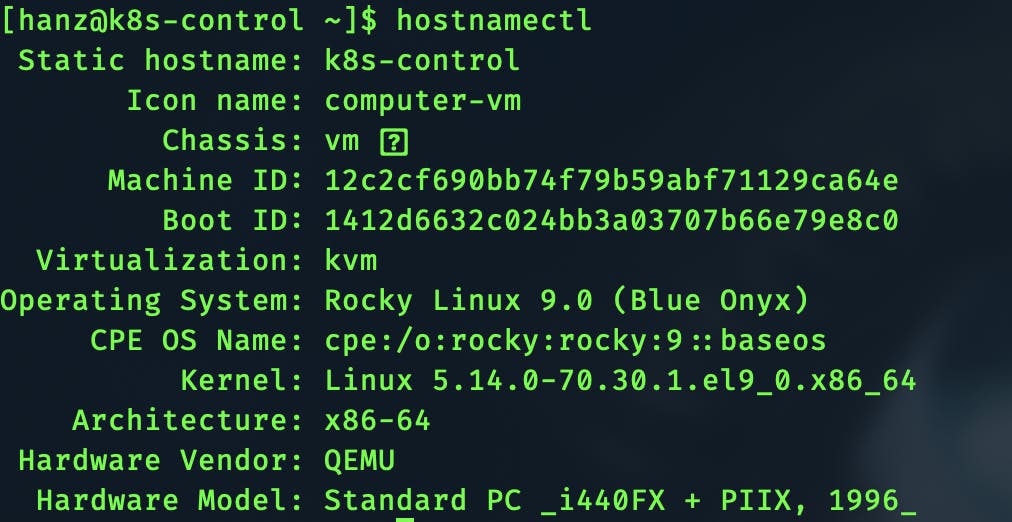
Check your hostname.
hostnamectl
sudo hostnamectl set-hostname k8s-control
Set your desired hostname, in my case k8s-control for control-node & k8s-node1 for worker-node1.
Set appropriately.
1.3.4 set static IP
Determine your IP address on your local network.
ip address
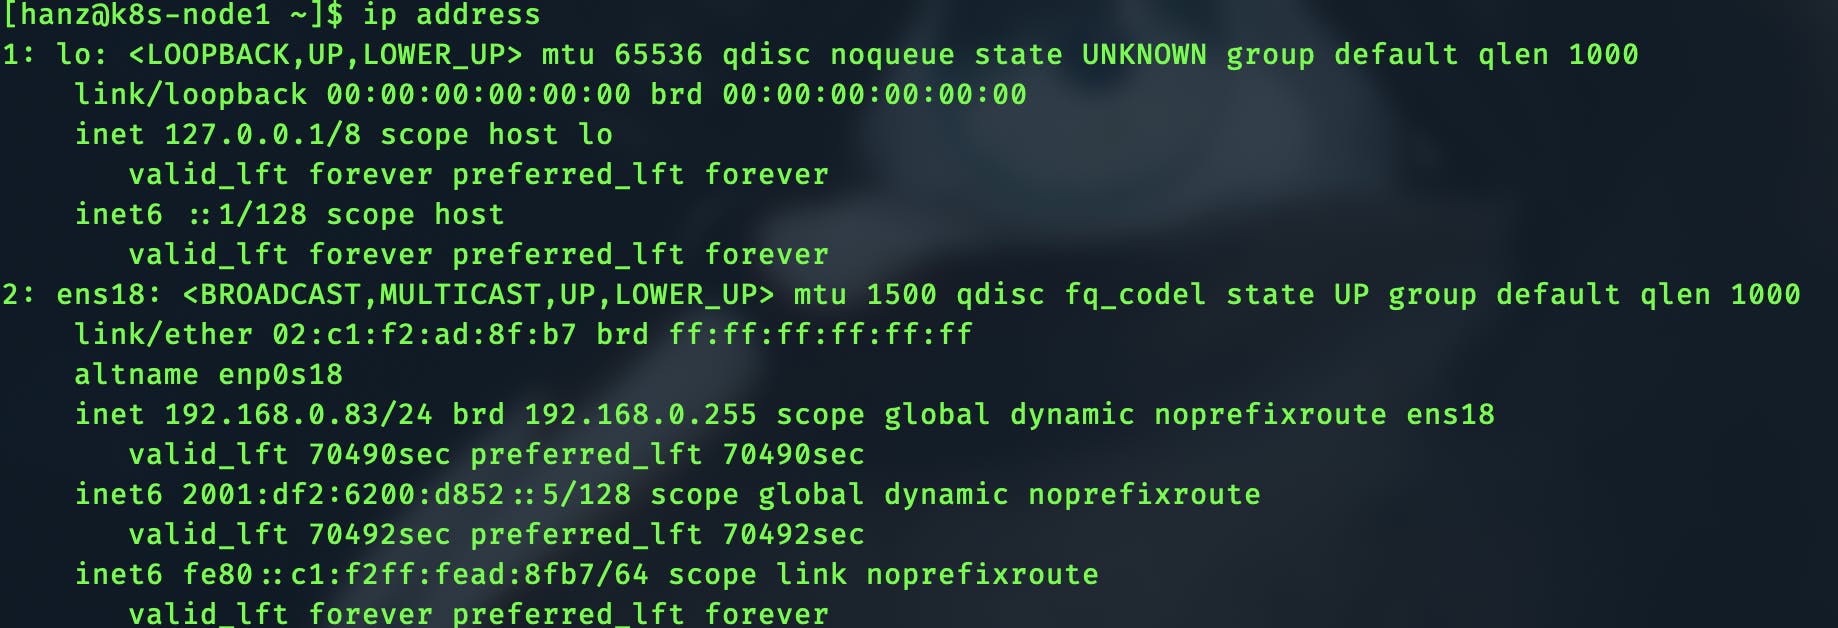
The IP address is assigned by the DHCP server in your router.
It is recommended to set up a static IP on your router for the nodes. The procedure depends on the router model.
1.3.5 login with ssh
Check if sshd is running.
systemctl status sshd

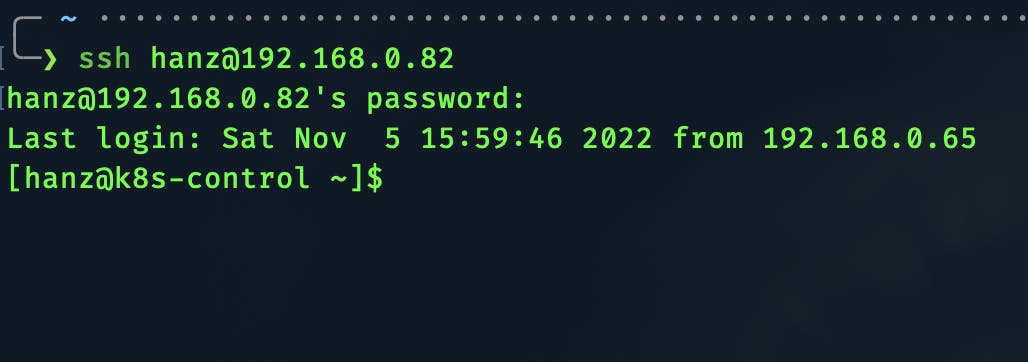
Try logging in through SSH from your computer or laptop to the nodes. (not proxmox device)
ssh user@192.168.0.82
Replace user with your username and 192.168.0.82 with your relevant IP.
Repeat for all nodes.
Now we can begin installing Kubernetes.
2. Install Kubernetes
2.1 install k8s tools, containerd
2.1.1 kubernetes repo
Add the Kubernetes repository to the package manager.
cat <<EOF | sudo tee /etc/yum.repos.d/kubernetes.repo
[kubernetes]
name=Kubernetes
baseurl=https://packages.cloud.google.com/yum/repos/kubernetes-el7-\$basearch
enabled=1
gpgcheck=1
gpgkey=https://packages.cloud.google.com/yum/doc/rpm-package-key.gpg
EOF
Install kubeadm, kubectl, kubelet
sudo dnf install -y kubeadm kubectl kubelet
2.1.2 containerd
Add docker repo which provides containerd & install it.
sudo dnf install dnf-utils -y
sudo yum-config-manager --add-repo https://download.docker.com/linux/centos/docker-ce.repo
Install it.
sudo dnf install -y containerd.io
Configure containerd
sudo mkdir -p /etc/containerd
sudo containerd config default | sudo tee /etc/containerd/config.toml
Edit the config.toml file.
sudo vi /etc/containerd/config.toml
Find the line with the below text.
Change SystemdCgroup = false to SystemdCgroup = true
[plugins."io.containerd.grpc.v1.cri".containerd.runtimes.runc.options]
  .
  .
  SystemdCgroup = true
Press ESC and type:wq to save and exit.
Enable containerd
sudo systemctl enable --now containerd.service
2.1.1 lock versions of kube (optional)
sudo dnf install yum-plugin-versionlock -y
sudo dnf versionlock kubelet kubeadm kubectl
2.2 relevant optimizations
2.2.1 disable swap
sudo sed -i '/swap/d' /etc/fstab
sudo swapoff -a
2.2.2 disable selinux
sudo setenforce 0
sudo sed -i 's/^SELINUX=enforcing$/SELINUX=permissive/' /etc/selinux/config
2.2.3 enable bridging and IP forwarding
sudo vi /etc/sysctl.d/k8s.conf
Add the following text and save the file. :wq
net.ipv4.ip_forward = 1
net.bridge.bridge-nf-call-iptables = 1
net.bridge.bridge-nf-call-ip6tables = 1

2.2.4 enable kernel modules
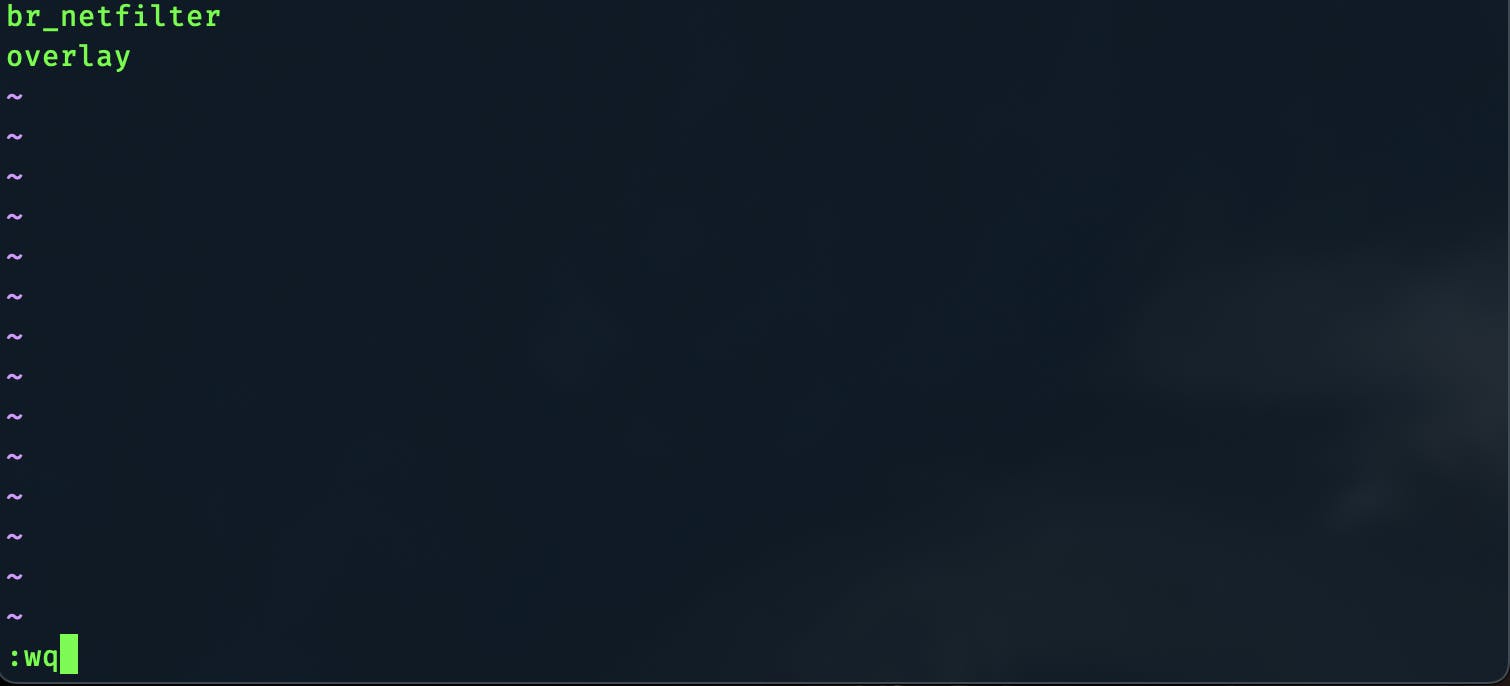
sudo vi /etc/modules-load.d/k8s.conf
Addbr_netfilter & overlay in each line.
Press ESC and type:wq to save and exit.
Reboot to apply the settings so far.
sudo reboot
Check to see if relevant kernel modules are loaded.
lsmod | grep br_netfilter
lsmod | grep overlay

2.3 install Kubernetes
2.3.1 enable kubelet
sudo systemctl enable --now kubelet.service
2.3.2 open up ports with firewalld
sudo firewall-cmd --permanent --add-port={6443,2379,2380,10250,10251,10252}/tcp
sudo firewall-cmd --reload
Note: I have disabled my firewall completely, as the setup is not accessible from outside my home network.
2.3.3 initialize with kubeadm (controller-node only)
sudo kubeadm init --control-plane-endpoint=192.168.0.82 --node-name k8s-control --pod-network-cidr=10.244.0.0/16
If successful, it will print out a few commands for you to run. Copy the worker-node join command and run it in each worker node.
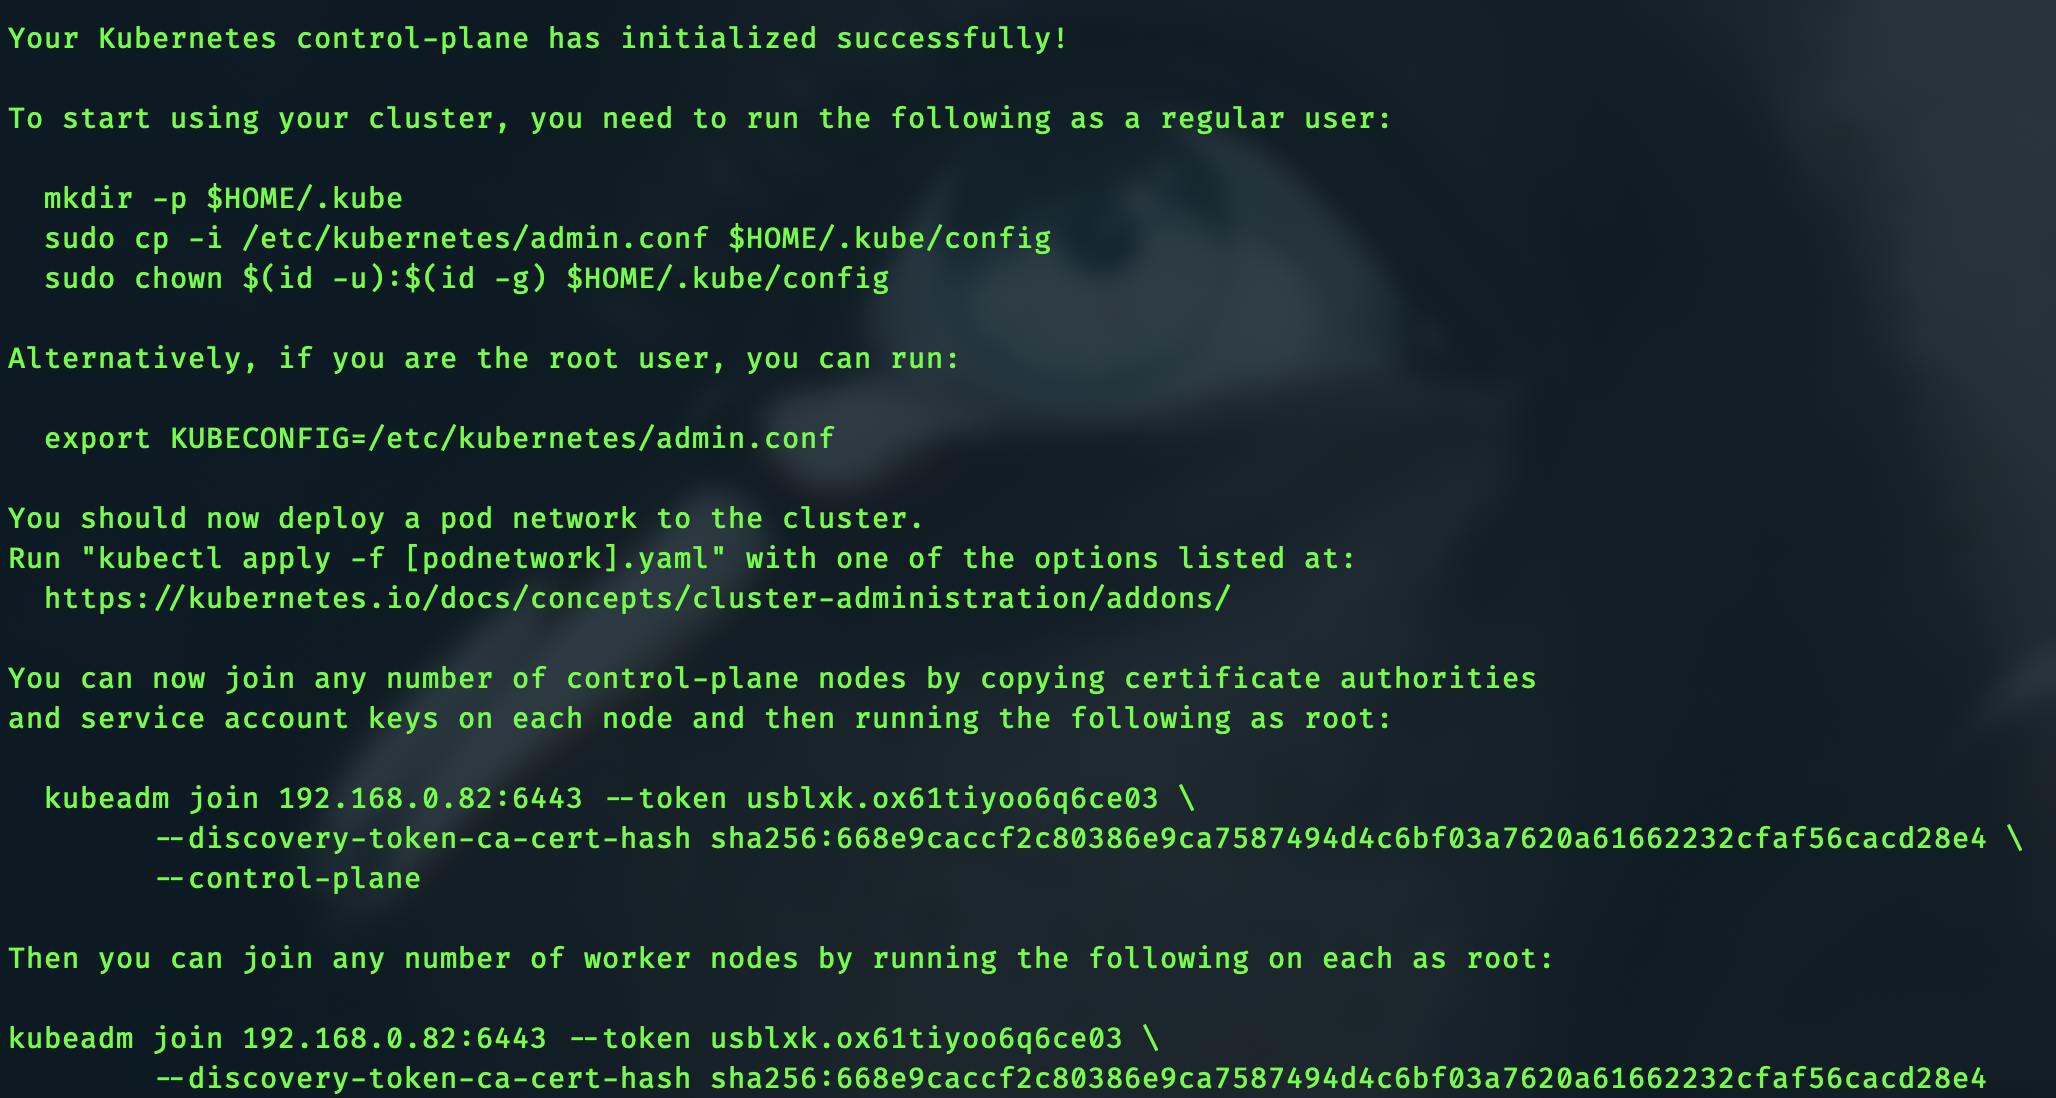
Run these commands in the control plane.
mkdir -p $HOME/.kube
sudo cp -i /etc/kubernetes/admin.conf $HOME/.kube/config
sudo chown $(id -u):$(id -g) $HOME/.kube/config
If, for some reason, the above join command expires or does not work, the below command will regenerate the command.
kubeadm token create --print-join-command
Try running the commandkubectl get nodes to see the nodes.

2.3.4 install an overlay network
Apply on control plane.
kubectl apply -f https://raw.githubusercontent.com/flannel-io/flannel/master/Documentation/kube-flannel.yml
Now the nodes will start to show as Ready.

2.3.5 check
Execute a command to get all pods in all namespaces.
kubectl get pods -A -o wide

2.4 beyond
Kubernetes, by default, does not come with a load balancer built in; hence, you must provide one or find some other workaround.
I am using MetalLB as a load balancer and NGINX as an ingress controller; documentation for the same is available here. Some of my relevant config and manifest files are here.
references
This blog post is inspired by a video and blog post by Jay at Learn Linux TV. Check out his YouTube video here and the relevant blog post here.
Tutorials for installing Proxmox VE are available at the links below.
davenewman.tech/blog/install-proxmox-on-a-l..
youtube.com/watch?v=EfIfoWAV_g8
youtube.com/watch?v=_u8qTN3cCnQ
Connect with me over at Linkedin here.